Badge
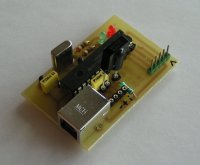
Receiver
IRIS stands for IR Identification System. This systems allows you to detect the presence and identity of users at proximity of given places. The system comprises badges worn by people, as well as stationary receivers connected to USB ports. Read the more detailed documentation (in French).
Both IRIS hardware and software are released as "open source" (CeCILL-B license), so that it can be used, and possibly improved or adapted, by any HCI practitioner. On this page, you can find all the information needed to build and use the system.
Hardware
Hardware is quite simple; it is based on Microchip PIC microcontrollers.
Making the circuits
The PCBs have been designed with ExpressPCB.
Badge directory: contains the PCB, assembly source code for the PIC 12F508/509, as well as compiled version of the firmware, for eight badges with identifier ranging from 0 to 7.
Receiver directory: contains the PCB, C source coude for the PIC 18F2455, as well as a compiled version of the firmware.
Hardware installation
Currently, IRIS receivers can be connected to computers running Windows NT/XP/Vista/7.
First, plug the receiver into a USB port. Immediately, the receiver's red and green LEDs should light up. Soon afterwards, Windows should pop up a driver installation window. Select the “manual installation” options, and point the dialogs to the file mchpcdc.inf (included in IRIS distribution). After that the driver has been installed, the red LED should go out, and the green LED should start blinking. It means that the device has been configured correctly. You should be able to use it.
To test the device, simply run demo.bat. It pops up a window displaying the list of currently detected badges.
Note that if you have several USB ports on your computer, you will have to go through these steps each time you wish to use the receiver on a port on which it has never been used before.
Meaning of LED patterns
| Pattern | Meaning |
|---|---|
| red and green LEDs, static | The driver is not installed |
| green LED blinking | The driver is installed; the device is ready |
| green LED blinking, red LED flashing | The driver is installed, the device is ready, and it is currently detecting infrared signals |
| both LEDs out | The device is not connected, or is out of order |
Software
Communication layer
When you connect the IRIS receiver, Windows emulates a communication (RS-232) port. The receiver uses this communication port to send information formatted as lines of text. You can directly connect to the communication port using any terminal program such as Hyperterminal.
For more information on lower-level layers, please see the technical documentation (in French).
Software API for Java
The Java API hides the communication layer. It is enclosed in a iris package. See the Javadoc documentation in the javadoc directory. It is based on the RXTX library, available for Linux (X86), Mac OS X (PPC & X86), Windows NT (X86) and Solaris (SunSPARC).
On Mac OS X, you must create a directory /var/lock (sudo mkdir /var/lock) if it does not exist, and write access to the current user (for instance with sudo chmod a+rw /var/lock).
Source code for the API
The source code is included in the file java_library.zip.
Download
iris.zip – Contains all the files mentioned above.
Scientific Publication
Christophe Jacquet. IRIS : identification d'utilisateurs par badges infrarouges, Proceedings of IHM 2007, Nov 2007. pp. 287-290. ACM Press.
Legal
License
The IRIS project (both hardware and software) is released under the CeCILL-B (BSD-like) license:
- CeCILL-B Free Software License Agreement
- Contrat de licence de logiciel libre CeCILL-B (French version)
No warranty
The software and harware design are provided AS-IS, without any kind of warranty. Use it at your own risk. However, if you try using it and experience problems, I would be glad to help. Don't hesitate in this case to drop me an e-mail.
Contact
Christophe Jacquet
Supélec - Département Informatique
3, rue Joliot-Curie
91192 Gif-sur-Yvette Cedex